Adding TextView and EditText to App: How To
By: MK Tomassi
Introduction
This tutorial will teach you how to add text components to an android program using xml layouts
In the beginning…
·
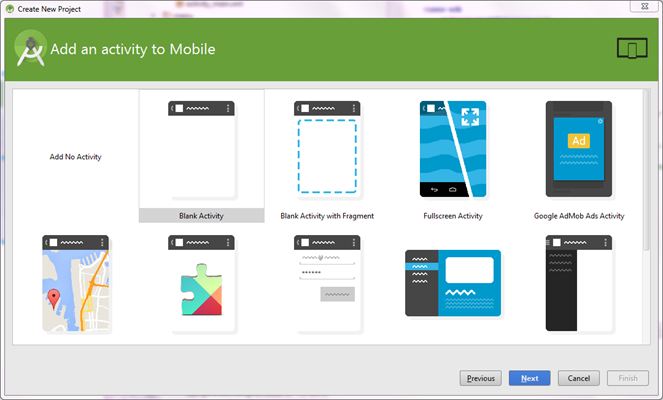
Open Android Studio and create a new project with a blank
activity.
·
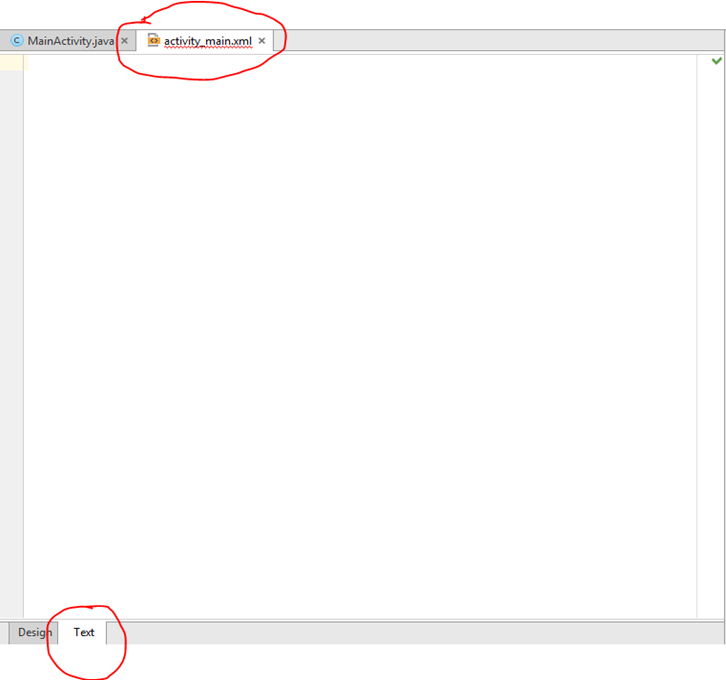
In the .xml file, go to the text section and delete everything.
· Add a Linear Layout either by copying/pasting the text below into your .xml file or by adding one in the design tab of your .xml file.
|
<LinearLayout xmlns:android="http://schemas.android.com/apk/res/android" android:orientation="vertical" android:layout_width="match_parent" android:layout_height="match_parent">
</LinearLayout> |
· Then add a Plain TextView to your.xml file. You can then change the text by changing the quoted selection after android:text= . The android:id="@+id/textView" is the tag that you will use to identify your TextView box in the rest of your code. If you would like to refer to your TextView box as boxText1 in your code, change the tag to this: android:id="@+id/boxText1" .
|
<LinearLayout xmlns:android="http://schemas.android.com/apk/res/android" android:orientation="vertical" android:layout_width="match_parent" android:layout_height="match_parent">
<TextView android:layout_width="wrap_content" android:layout_height="wrap_content" android:text="New Text" android:id="@+id/boxText1" />
</LinearLayout> |
·
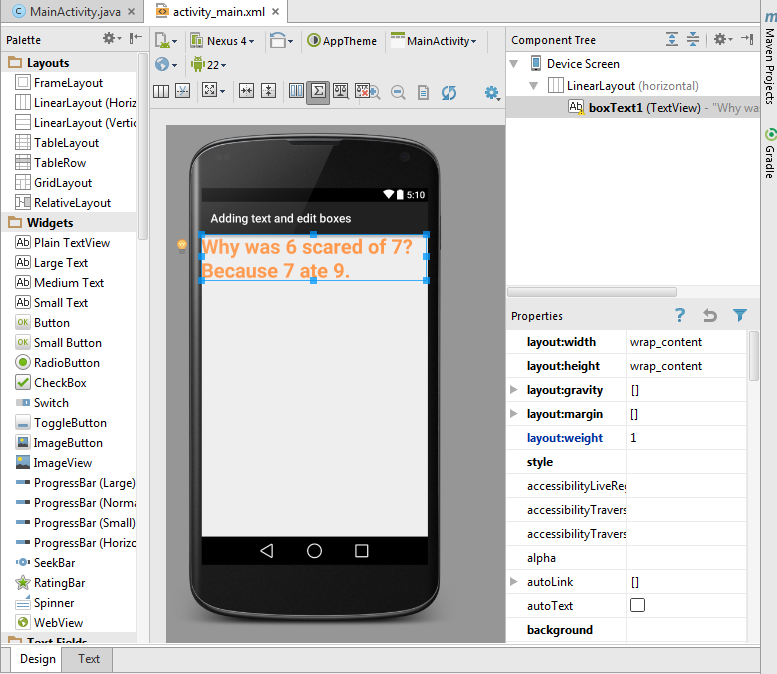
If you go to the “Design” tab of the .xml file, you can edit many
things and see the edits as you go. You can edit the properties of your
components in the “Properties” section at the lower right of the screen. For
example, I changed the layout:weight to “1” below. this makes the TextView take
up the entire row. (If there were multiple objects in that row and they all had
a weight of “1”, then they would all be evenly spaced.)

·
Here I changed the contents of the box, the text size, color,
style, and the typeface.
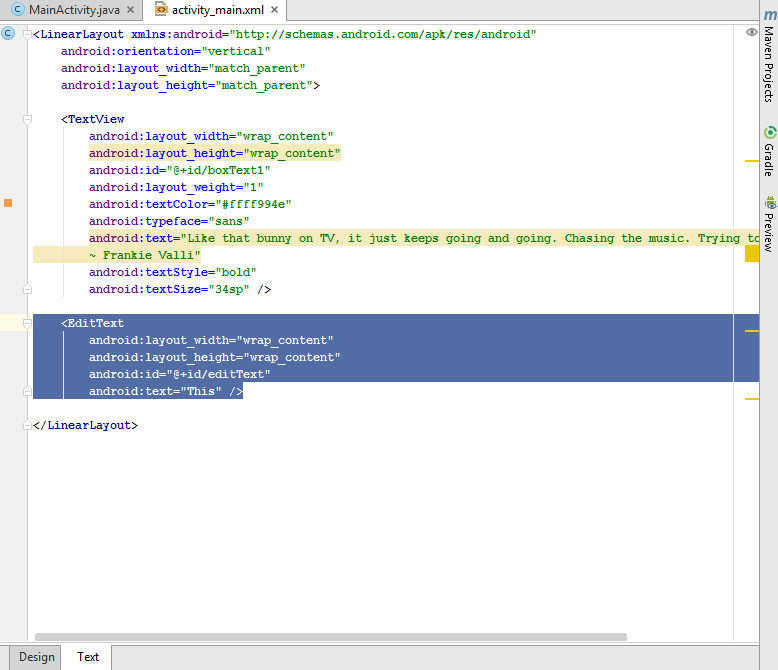
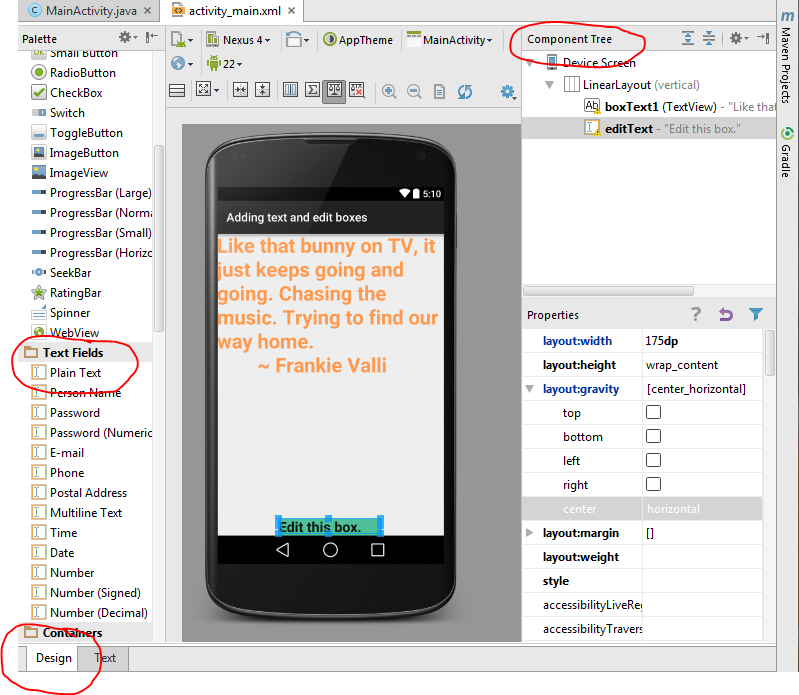
· To add an EditText, a text box that the user can edit, go to the “Text” tab of your .xml file and add the following text.
|
<EditText android:layout_width="wrap_content" android:layout_height="wrap_content" android:id="@+id/editText" android:text="This" /> |
·
In the “Design” tab of your .xml file, you can add an EditText box
by selecting “Plain Text” from the list of “Text Fields” shown at the bottom
left and dragging it to the component tree (at the top right).
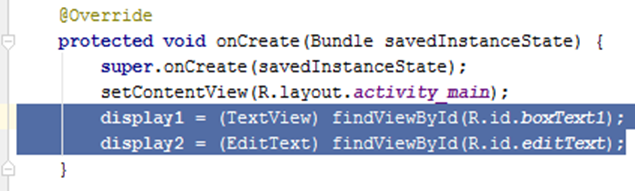
Connect components of your app to your code:
- Create fields in your java code and
initialize them by adding the code below to your onCreate method:
display1 = (TextView) findViewById(R.id.boxText1);
display2 = (EditText)
findViewById(R.id.editText);
- This will be used in future tutorials to edit the components based on other events in the program